My Creative endevours have moved


FOLLOW ME TO
MY NEW ART BLOG HERE I would love your company.

A New Year and a New beginning... I have created a new blog filled with old and new art. It is time for me to focus on something new. I will be leaving this blog open for inspiration and so I can look back at what I have achieved in the future but I will be adding no further content here.

Showing posts with label frame. Show all posts

Tuesday, 21 December 2010

Christmas....

is coming... and so is Santa... you do believe in him don't ya ;-)  So in honour of the cuddly man with the white beard I created him a star of his very own.  I used gorgeous paper from Crafty Individuals....


as well as this gorgeous portrait of the man himself from the same place.  He deserved a frame and this wee frame from Tando was just the job.  I coloured it with copics before adding Tim Holtz crackle paint .  The two little hearts on top were removed from the sides.


Hope you are ready for him :)

hugs
Chris xx

Saturday, 11 December 2010

Flower power

Time to share some of the DT goodies I have been creating.  The little chipboard flower frames from Tando Creative  are just the cutest and fun to use. They also receive colouring with Copic pens delightfully. The chippie absorbs the ink so layering the colour produces a lovely varied effect and it's sooo easy!! I used the frame part of the flower on this arch ....


cos this little girlie from Lisa's altererd art deserved a pretty frame :D


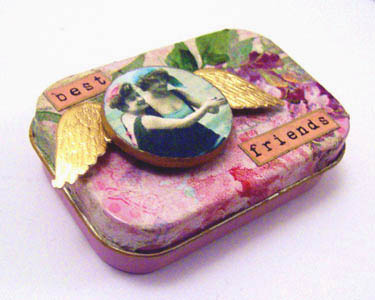
I couldn't leave the center circle  that pops out of the chipboard flower so used it on this little mini tin that I covered with tissue and modpodge.


I added some wings to the flower centre piece and adhered this image ...also from Lisa's altered art ...onto it edging the piece with a gold ink pen.


Small is beautiful :-)
Check out more gorgeous projects on the Tando blog.
hugs
Chris xx

Thursday, 6 May 2010

Fridge magnet card

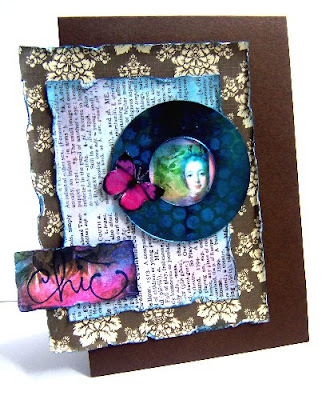
On a little shopping trip to The Range with my pal Chriss last week I found some mini mirror frame magnets and thought they would be fun to alter.  I had a few thank you cards to make so decided to add one of the magnets to this card so that the gift could be used after the card was finished with.
I inserted an inchie image inside the mirror frame and sponged stazon ink through some sequin scrap to decorate the mirrored surface itself.  Topped it off with a hand cut butterfly coated with diamond glaze before adding it to the card.


loving text paper and the fabby brown linen paper from Papermania new collection. Edged with distress ink... well it just had to be didn't it.  They are never far from my hands while crafting these days... love love love them.... did I tell ya I love distress ink...lol
hugs
Chris xx

Saturday, 14 March 2009

Funky Fairies - Creative Designer

A wee while ago Shaz had a call for guest Creative Designers for the Funky Fairies Papercrafts site so I put myself forward and she sent me a lovely email saying she would love to see more of my creations and here are some of my first.
There are lots of freebies to download from the Funky Fairies Inspiration blog and also a weekly challenge on the Funky Fairies challenge blog so pop on over through the links and see what everyone is up to :D
Bit of a long post this one picture-wise but as I haven't posted for a while I thought I would give you some eye candy to look at. Feast after the famine...lol
First of all I decorated this candle with papers from the' Doodlementals' freebies adding a bit of lace and some 3d hearts. The candle should be for decorative purpose only but in a moment of weakness I couldn't resist lighting it.... I put it out fairly quickly though :D
Next is a frame I altered with some of the papers from 'In with the old' this is one of my favourite kits. I patched some papers for the background behind the photograph and cut out a corner and hearts to decorate the front along with some chipboard letters.

I had to make at least one card and used two of the 'Dots are distressing' papers for the background. I just had to add some ribbon and bling too :D
I sculpted the leaves and stem from some matching card and added this layered flower from the 'Doodlementals' printable flowers that I used a water pen and dye based inks to colour.
Finally (was that a sigh I heard....rofl) I decorated a notepad block and tin with papers once again from 'In with the old' adding some sticky ribbon and some more chipboard lettering.... to make a desk set for my craft space :D
Okey Dokey that's me lot for now.
Hope you are all enjoying the weekend :D
hugs
Chris xx